Photoshop Levels, Shadows & Highlight video tutorial

Photoshop step by step video tutorial on using Levels, Shadows and Highlights to edit an image.
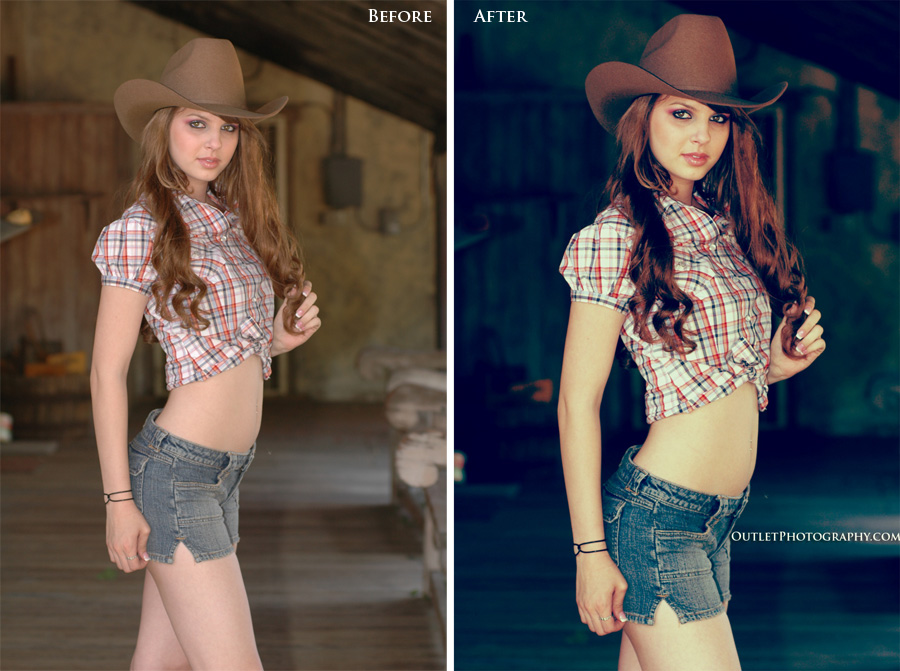
In my previous article I showed you how to easily airbrush an image using Photoshop, today we’ll be working on adjusting the shadows and highlights of an image. Most people simply use the “brightness” feature, if you’ve used this in the past you know the drawbacks. The brightness controls the entire spectrum of the image, often leaving bright areas much too over exposed.
By using the Levels and Shadow/Highlight features, we’ll be able to restore an image to something that is much more presentable. To get the most of this video tutorial, first watch the video below at the highest setting (720HD) that your computer and download rate can handle, then come back and see the steps I took.
First I opened the CH 53E Super Stallion Helicopter image on Photoshop. Then I completed the following steps:
- Added two new layers – CTRL+J (twice)
- Added a new group – While the two new layers are highlighted > CTRL+G
- Rename second copy layer to “Layer 2”
- Click the visibility (square eye) on layer 2 (it should be off/blank)
- Highlight Layer 1 > Image>Adjustments>Shadows/Highlights
- On Shadows/Highlights box > Shadows> Amount: 60% – Tonal Width: 30%
- On Shadows/Highlights box > Highlights> Amount: 15% – Tonal Width: 50%
- On Shadows/Highlights box > Adjustments>Midtone Contrast: -15
- Now click on Layer 2 visibility (eye ball box) and highlight Layer 2
- Then Image>Levels> and make sure Channel RGB is selected, Input Levels: center number 1.80
- Highlight Layer 2 and use the fill slider to 64%.
- Click on File>Save As…and that’s it!
As I mentioned on the video, I’m simply including the step by step details for reference, each photo will need different settings. In addition, there are several methods to arriving at this same or similar final image.
If you have an image where half of it is over exposed and the other half under exposed, these steps may help. But be aware that an image that is too overexposed will most likely not be salvageable.
Levels as well as the Shadows/Highlight features of Photoshop are great tools. Experiment with your images and see if they can bring out the “pop” you are looking for. These are wonderful tools for editing your images, but as most photographers will say, it’s best to get it right on the field the first time rather than try to save it later in Photoshop!
If you have any questions or simply want to share an image or technique you use, feel free to leave a comment below!