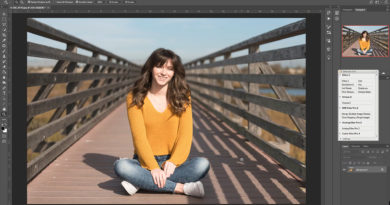
Photoshop Airbrush step by step video tutorial

I’ve added a step by step Photoshop video tutorial giving you a look at how I edit my images. I’ve shown a few how to photo editing tips in the past, but today I’ve created a free, simple way for you to airbrush images yourself!
You don’t need to be a Photoshop expert to edit your images. By following a few basic steps below, you can airbrush your images with ease.
For best results, I recommend you first view the video below. The video is large, but if your computer can handle it, view it in 720HD and full screen mode. This will allow you to see my steps in detail.
After viewing the airbrush video, use the numbered steps below to see what I did and in which order. The outlined steps will help you re-create the process when editing your image on Photoshop.
Photoshop airbrush tutorial in 16 steps:
- Create a new Layer – CTRL+J (named Layer 1)
- Create a new Group – CTRL+G (name it Airbrush)
- Highlight Layer 1 then Filter>Blur>Surface Blur (use Radius 37, Threshold 19)
- On Layer 1 add new layer – Shift+CTRL+N (call it “texture”)
- Right click on Texture, Blend Mode>Hard Light
- On Texture – Shift+F5 – Fill should be 50% Gray
- Use Eyedropper to get sample of skin
- On the right side slider, make sure HSB is shown
- Use CTRL+U – Saturation/Hue settings: Hue 18, Saturation 26, Lightness 34
- Highlight Group Airbrush, then layer drop down menu – Layer>Layer Mask>Hide All
- Use Brush Tool to on the face
- Use Eraser Tool to clear out the eyes, eyebrows and mouth
- Highlight Texture Layer then use CTRL+U and enter: Hue 9, Saturation -45, Lightness -9
- Still on Texture Layer, go to drop down menu Image>Apply Image>Channel “Red”
- Highlight Group Layer then use the Opacity and change to 50% or whatever looks good to you.
- Hit save as and share your photo!
Always remember that it’s easier to work on a large copy of an original image. Never edit the original image, always make a copy for editing. Try to remove any major blemishes on the image prior to using this tutorial.
One last important recommendation, it’s always best to use a pen & touch tablet like the Wacom Bamboo Pen & Touch or other similar type. All the steps above can be done with a mouse, but if you are going to be doing any serious Photoshop work, a pen and tablet method would be best.
If you have any questions regarding this video or the steps I described, feel free to leave a comment. Also, why not share with the rest of us your edited image if you used these steps? I’d love to see them, leave a comment below.